The Plex Media System can be a really fun way to organize your media collection, create stunning Netflix-like dashboards, and stream all your content anywhere in the world. You can also invite your friends so that they can stream your media library from their homes or also be invited to your friend’s media library.
Plex is free and relatively simple to install. Depending on your playback or streaming demands, Plex Media Server can be installed almost anywhere, from a standard desktop, a NAS, or even a cloud-based Seedbox server.
Streaming your media collection to your favorite screens has never been so easy!
1. What is Plex Media Server?
Plex Media Server is the core element of the Plex media player system. The Plex server makes all your stored media, including movies, TV shows, music, photos, etc., accessible to any device worldwide.
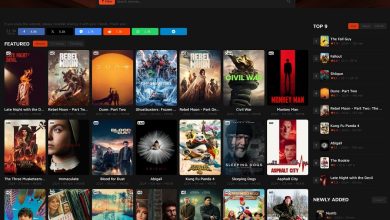
If you are looking to put those stored hard disks full of amazing media to good use, then Plex is the right choice. It will provide a structure for all that media, fetch content metadata from the Internet, including movie posters, subtitles, and make it accessible to you via a Netflix-like UI.
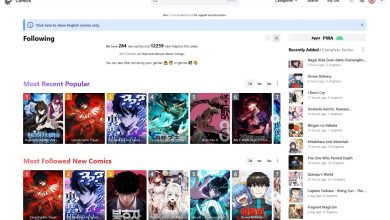
There are many free streaming sites, but Plex Media Server is one of the only free streaming servers out there. With it, you can basically create a free streaming service.
If you have a 4K movie stored at home, it would be impossible to stream it on a remote device or mobile without transcoding it first. Plex Media server will test the bandwidth and the destination Plex Client’s screen and deliver the right bitrate and dimensions.
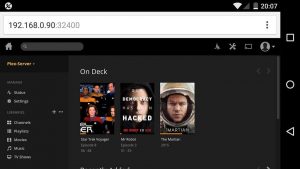
Below is a screenshot of how a Plex client looks on a mobile screen.

2. What You’ll Need for Plex Server?
Plex Media Server does not stand alone; it is an element of the client-server media player system. The server is the engine behind the curtains, keeping everything together, organize, and allowing access to the Plex Clients.
The clients are installed on the devices, usually mobiles, TVs, desktops, tablets, game consoles, etc. They provide the connectivity back to the server, show the Netflix-like menu, and play the media according to device and bandwidth. The client is supported by a large number of devices, OSs, and web browsers.

Finally, there’s another core element, the Plex Central Server. This is Plex’s server, in charge of storing and keeping the information of your Plex account. The Plex Central Server provides connectivity between your remote Plex clients accessing your home-based server through the Internet.
Server’s Processing Power.
Plex Media Server can be installed almost anywhere. From popular OS to any NAS, and even Docker containers.

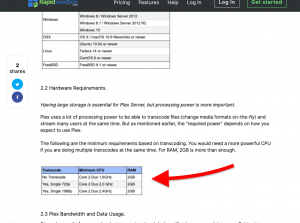
As minimum processing power, Plex recommends at least Intel Core i3 (or equivalent) on the Plex Media Server, which is enough for playback on the local computer and giving access to 1-2 local area network users. But as soon as you start providing access to more remote users, inviting friends to your library, providing streaming to many devices, Intel Core i3 is not enough. Encoding and transcoding media streams require intensive processing power, so you’ll need to upgrade your server.
According to this comprehensive Plex guide, having a CPU is far more critical than RAM. A single transcode from full HD (1080p) to change the resolution to 720p on an average bitrate of 5-6Mbps, would require a Core 2 Duo 2.4GHz.

Internet Access and Fast Bandwith.
Additionally, if you provide remote access to devices outside your home networks, such as inviting friends to your media library or accessing your home movies from a mobile device on the go, you would need to accept incoming connections and provide a fast media upload.
In terms of internet access you’ll need:
- A router that forwards remote incoming connections to your home server. For security reasons, home routers, by default, do not accept any request of unknown ports. You might have to configure port forwarding for Plex or enable UPnP.
- Firewalls and other security elements that accept Plex. Firewalls will also block unknown requests for the port. So make sure your firewall, VPN, AV, or any other Detection/Prevention mechanisms allow Plex services.
- Fast bandwidth. You might have a powerful server, but if you lack a decent bandwidth, streaming will not be feasible.
3. Setting up Plex Media Server.
The process for setting up the server is divided into three stages: Open an account with Plex (it’s free), download and install Plex, and configure it.
This guide focuses on installing Plex and setting up additional features to enhance the experience.
Prepare your media.
Before installing the Plex Media Server, it is good to organize (or re-organize) your media content collection.
Re-structure your media. Create folders for each media category. For example, one for Movies, one for TV shows, Music, Photos, and rename all those folders and files with the correct name. Putting everything where it belongs will likely take some of your time, but it will help Plex to find and match media content automatically.
The structure can be as follows.
- Centralize everything into one storage device and create ONE main folder.
- Distribute media files where they belong in subfolders like movies into the Movie folder, TV shows into TV shows folder, etc.
- Note that you can be creative here. For example, you can create folders for home videos, photos, short movies, long movies, TV shows, anime, etc.
Installation and Configuration.
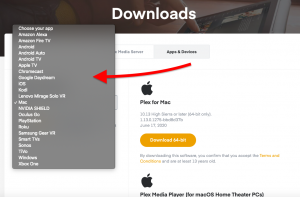
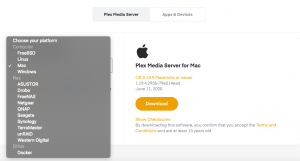
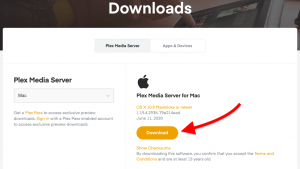
The installation process is very straightforward. Just download the .zip or .exe file and follow the installation wizard, according to your OS.
Once the installation is successful, the Plex Media Server will start automatically.
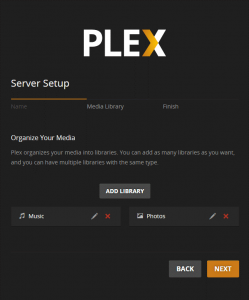
In the next step, you’ll need to add media libraries to the Plex server. If you prepared and organized your media for Plex previously, you’ll have an easier time here.
Point Plex into the main folder and start adding as many libraries as you choose. Adding libraries should be relative to the subfolders of the main folder.
Specify the media folder with the “Add Library” button.

After creating all your libraries, the Plex Media Server will run on the background, and any client that connects to it, within its LAN or WAN, will have access to all its libraries.
Although Plex Media Server is running on the background, you’ll not find any particular interface or media player on the application. You can open the Plex interface using the web browser.
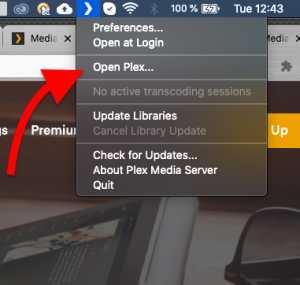
1. If you are on the server, you can open Plex from the bottom menu taskbar of a Windows (next to the clock). For macOS, select “Open Plex” found on the Plex icon above the desktop on the toolbar.

2. The UI interface (Plex Client) on the default web browser will open. You can also go to http://localhost:32400/web. But if you are on the same Local Area Network trying to access the server with another client, you can open your web browser (on the client) and type: “http://[Local Plex Media Server IP Address]:32400/web”.
3. If you are testing the access to Plex Media Server outside your home network (remote networks via the Internet), you can go to https://app.plex.tv/desktop, login to your account, and access your home-based Plex Media Server. Or https://app.plex.tv/web/app# if you are using something else than a desktop.


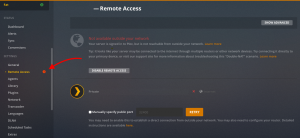
4. Internet Remote Access. Note that to accept remote access to your libraries, you’ll need to configure your server and most likely your home router. If you see a “Not Available Outside your Network,” in the Remote Access settings from Plex Server, you’ll need to perform a network troubleshooting process. First, check whether something is blocking the server’s connection, a VPN, a firewall, or maybe a proxy. The home router (default gateway) might also be blocking the incoming connection to the Plex port, configure the port forwarding or make sure UPnP or NAT-PMP is enabled.

4. A Cloud-based Plex Server
An on-premises Plex Media Server is terrific because it gives you total control over your resources. You can keep track of security, bandwidth, and server performance. If you are using Plex only on your house with 1-2 users, an on-premises server can be enough.
But if you want to invite friends to your media libraries, stream all your movies (transcode from 4K to mobile screens) on the go, or DirectPlay your 4Ks on your SmartTV, you’ll need a very powerful on-premises Plex Server and network.
An on-premises Plex Media Server can be challenging when streaming to multiple remote users due to:
- Server deployment and maintenance expertise.
- A Plex Media Server needs to be always on.
- Expensive infrastructure, including server, router, bandwidth, and utility expenses.
The Plex Seedbox.
The Plex Seedbox combines torrenting and Plex. A Seedbox is a cloud-based server that can be used as a Plex Media Server for streaming media. With a seedbox, you can build your media content on the cloud (using torrents) or uploading media, store it on the seedbox, and use the pre-installed Plex to stream all your media collection from the cloud.
There are countless more benefits with a Plex Seedbox.
1. Seedboxes are managed services. The provider maintains the server, upgrades it, and provides software for all torrenting+streaming needs.

2. Large storage. Content media usually takes up large storage. A Seedbox allows you to store all media ready for Plex and makes it accessible to you anywhere from any device.
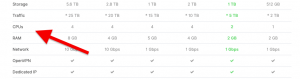
3. Powerful Servers. For all Plex Media Server’s streaming and transcoding needs, you’ll need a powerful server. A VPS Seedbox with enough CPUs, RAM, and bandwidth is tailored for delivering transcoded streams without buffering or blurry images.

Additionally, VPS Seedboxes come pre-installed with Plex, so it is just a matter of login into your account and start creating your cloud-based media collection.